本文基于istio官方文档https://istio.io/latest/zh/docs/setup/getting-started/。
试验环境是一个3节点的k8s集群,k8s版本是1.21。
1.下载istio
到istio的发布页面https://github.com/istio/istio/releases/下载安装包,此时版本为1.10.2,下载并解压缩:
wget https://github.com/istio/istio/releases/download/1.10.2/istio-1.10.2-linux-amd64.tar.gz
tar -zxvf istio-1.10.2-linux-amd64.tar.gz
进入解压缩后的安装包目录:
cd istio-1.10.2

tree -L 1
.
├── bin       该目录下包含客户端二进制文件istioctl
├── LICENSE
├── manifests
├── manifest.yaml
├── README.md
├── samples   该目录下包含示例的应用程序
└── tools
将istioctl添加到系统PATH环境变量:
export PATH=$PWD/bin:$PATH添加成功后可以直接使用istioctl打印一下版本信息:
istioctl version
no running Istio pods in "istio-system"
1.10.2
2.安装istio
istio为我们内置了一组安装配置的profile(config profiles)。这些profile配置提供了对istio控制平面和istio数据平面sidecar的定制内容。
这些profile有default, demo, minimal, remote, empty, preview。生产环境部署istio时建议使用default profile,而演示和评估istio建议部署demo profile,关于profile的更多内容可以查看官方文档https://istio.io/latest/zh/docs/setup/additional-setup/config-profiles/。
本节的目的是快速部署和评估istio,因此选择demo profile,它包含了一组专为测试准备的功能集合。
istioctl install --set profile=demo -y
✔ Istio core installed
✔ Istiod installed
✔ Ingress gateways installed
✔ Egress gateways installed
✔ Installation complete
Thank you for installing Istio 1.10.
安装完成后,查看一下namespace istio-system下的Pod和Service:
kubectl get pod -n istio-system
NAME                                    READY   STATUS    RESTARTS   AGE
istio-egressgateway-7d4f75956-kfpk6     1/1     Running   0          7m11s
istio-ingressgateway-5d57955454-945lq   1/1     Running   0          7m11s
istiod-6f6c6bbbbd-4286r                 1/1     Running   0          12m

kubectl get svc -n istio-system
NAME                   TYPE           CLUSTER-IP       EXTERNAL-IP   PORT(S)                                                                      AGE
istio-egressgateway    ClusterIP      10.105.21.145    <none>        80/TCP,443/TCP                                                               8m38s
istio-ingressgateway   LoadBalancer   10.106.130.216   <pending>     15021:31723/TCP,80:30709/TCP,443:31482/TCP,31400:32432/TCP,15443:31499/TCP   8m38s
istiod ClusterIP 10.104.215.150 <none> 15010/TCP,15012/TCP,443/TCP,15014/TCP 13m可以看出部署了istiod, istio-ingressgateway, istio-egressgateway。部署成功后再次使用istioctl查看版本,显示下面的信息:
istioctl version
client version: 1.10.2
control plane version: 1.10.2
data plane version: 1.10.2 (2 proxies)因为后边要部署的示例应用是部署在default namespace中的,下面给default namespace添加istio-injection=enabled标签,指示后续在此namespace部署应用时,自动注入envoy sidecar(边车)代理。
kubectl label namespace default istio-injection=enabled3.部署示例应用
下面部署bookinfo示例应用,bookinfo这个应用是一个在线书店的演示系统,由4个单独的微服务组成,可用于演示各种istio的特性。关于bookinfo应用的更多内容可查看官方文档https://istio.io/latest/zh/docs/examples/bookinfo/。
kubectl apply -f samples/bookinfo/platform/kube/bookinfo.yaml
service/details created
serviceaccount/bookinfo-details created
deployment.apps/details-v1 created
service/ratings created
serviceaccount/bookinfo-ratings created
deployment.apps/ratings-v1 created
service/reviews created
serviceaccount/bookinfo-reviews created
deployment.apps/reviews-v1 created
deployment.apps/reviews-v2 created
deployment.apps/reviews-v3 created
service/productpage created
serviceaccount/bookinfo-productpage created
deployment.apps/productpage-v1 created
确认default namespace下bookinfo下的每个pod都正常启动:
kubectl get pod
NAME                              READY   STATUS    RESTARTS   AGE
details-v1-79f774bdb9-5g8zh       2/2     Running   0          8m
productpage-v1-6b746f74dc-kldg7   2/2     Running   0          8m
ratings-v1-b6994bb9-htn5x         2/2     Running   0          8m
reviews-v1-545db77b95-g7nw7       2/2     Running   0          8m
reviews-v2-7bf8c9648f-wrcqq       2/2     Running   0          8m
reviews-v3-84779c7bbc-xgmlf       2/2     Running   0          8m

kubectl get service
NAME          TYPE        CLUSTER-IP       EXTERNAL-IP   PORT(S)    AGE
details       ClusterIP   10.110.77.235    <none>        9080/TCP   8m
kubernetes    ClusterIP   10.96.0.1        <none>        443/TCP    25m
productpage   ClusterIP   10.108.246.237   <none>        9080/TCP   8m
ratings       ClusterIP   10.101.2.25      <none>        9080/TCP   8m
reviews       ClusterIP   10.105.123.232   <none>        9080/TCP   8m
上面这些pod的容器数量都是2,Istio的边车代理容器istio-proxy也被自动注入随之启动。
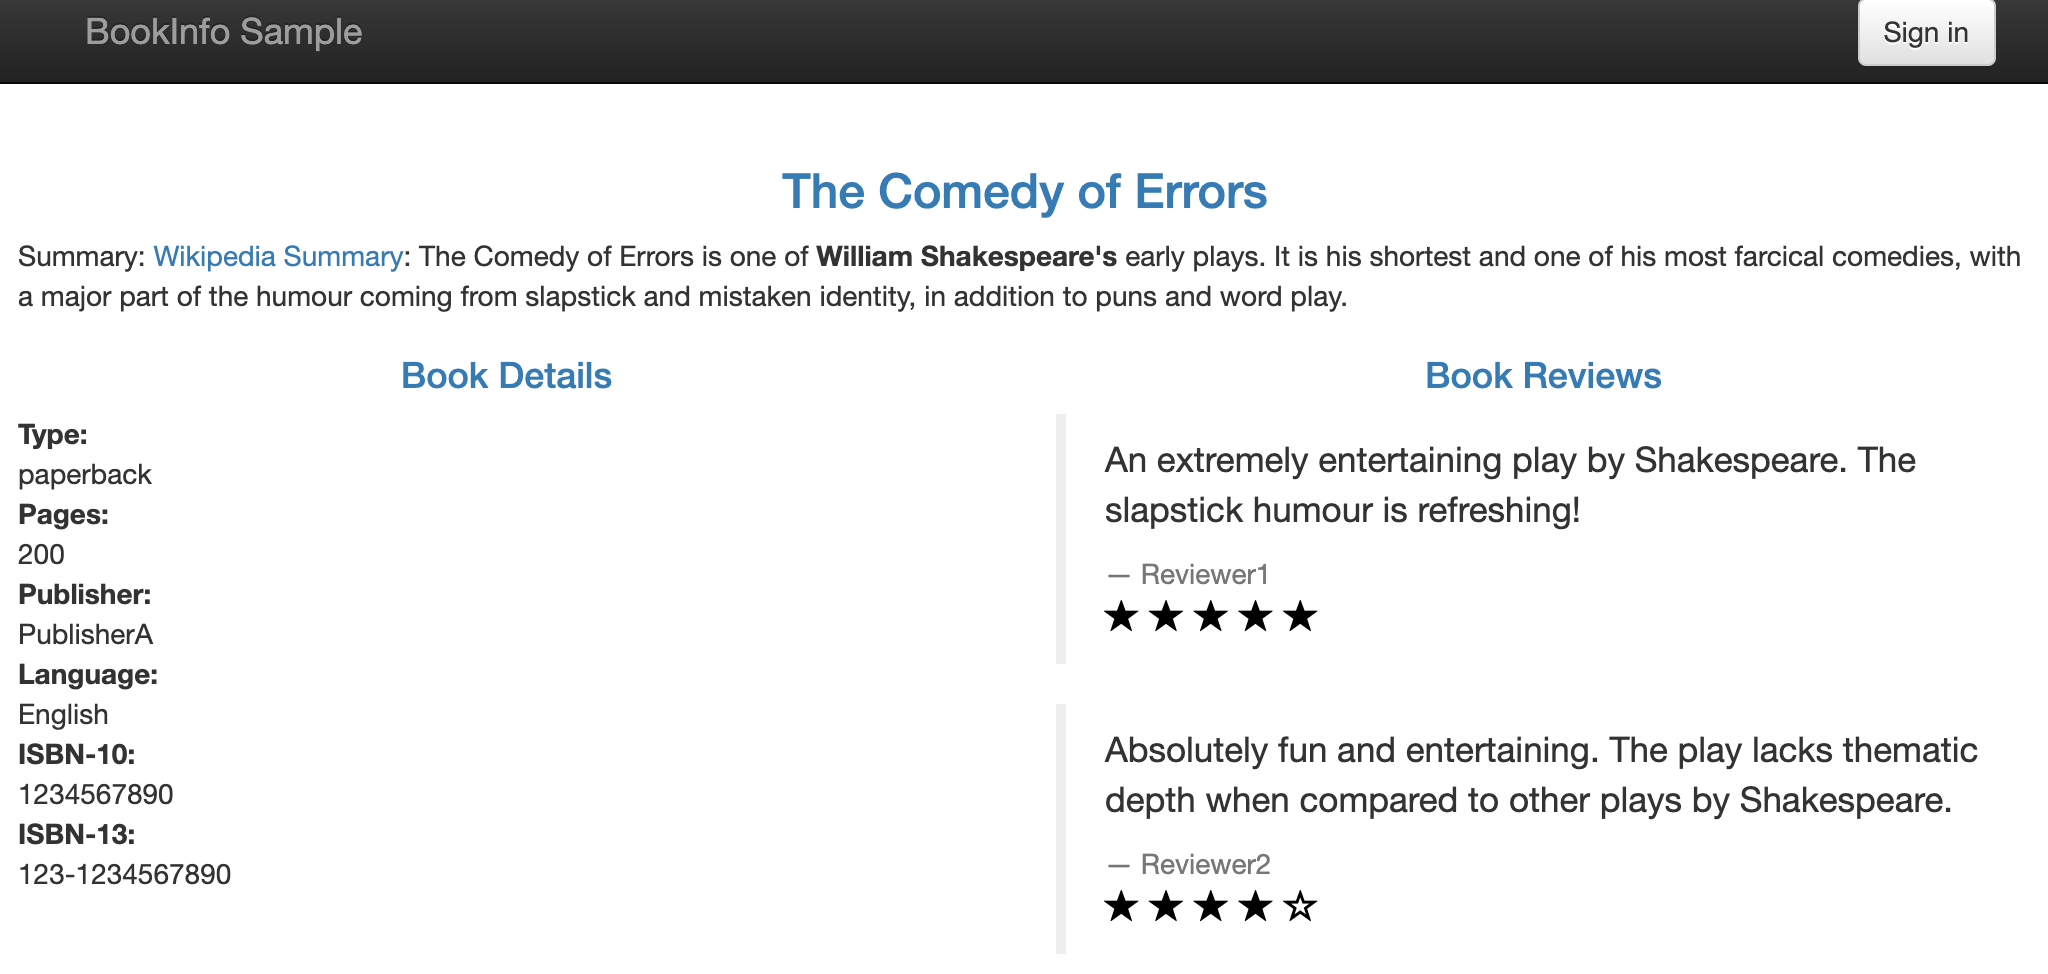
运行下面的命令进行验证,确认访问productpage服务可以返回页面标题:
kubectl exec "$(kubectl get pod -l app=ratings -o jsonpath='{.items[0].metadata.name}')" -c ratings -- curl -s productpage:9080/productpage | grep -o "<title>.*</title>"此时Bookinfo应用虽然已经部署,但还不能被外界访问。需要创建Ingress Gateway(Istio入站网关)在网格边缘把一个路径映射到路由。
将应用关联到istio网关:
kubectl apply -f samples/bookinfo/networking/bookinfo-gateway.yaml
gateway.networking.istio.io/bookinfo-gateway created
virtualservice.networking.istio.io/bookinfo created
4.从集群外部访问bookinfo应用
因为这里使用的k8s集群没有cloud driver和外部负载均衡器,Service istio-ingressgateway的ExternalIP是处于Pending状态的。
kubectl get svc istio-ingressgateway -n istio-system
NAME                   TYPE           CLUSTER-IP       EXTERNAL-IP   PORT(S)                                                                      AGE
istio-ingressgateway   LoadBalancer   10.106.130.216   <pending>     15021:31723/TCP,80:30709/TCP,443:31482/TCP,31400:32432/TCP,15443:31499/TCP   15m
在这种情况下先使用istio-ingressgateway的NodePort从集群外部访问bookinfo应用,这里其http的NodePort是30709。
浏览器打开http://NODE_IP:30709/productpage确保可以打开bookinfo的应用界面。
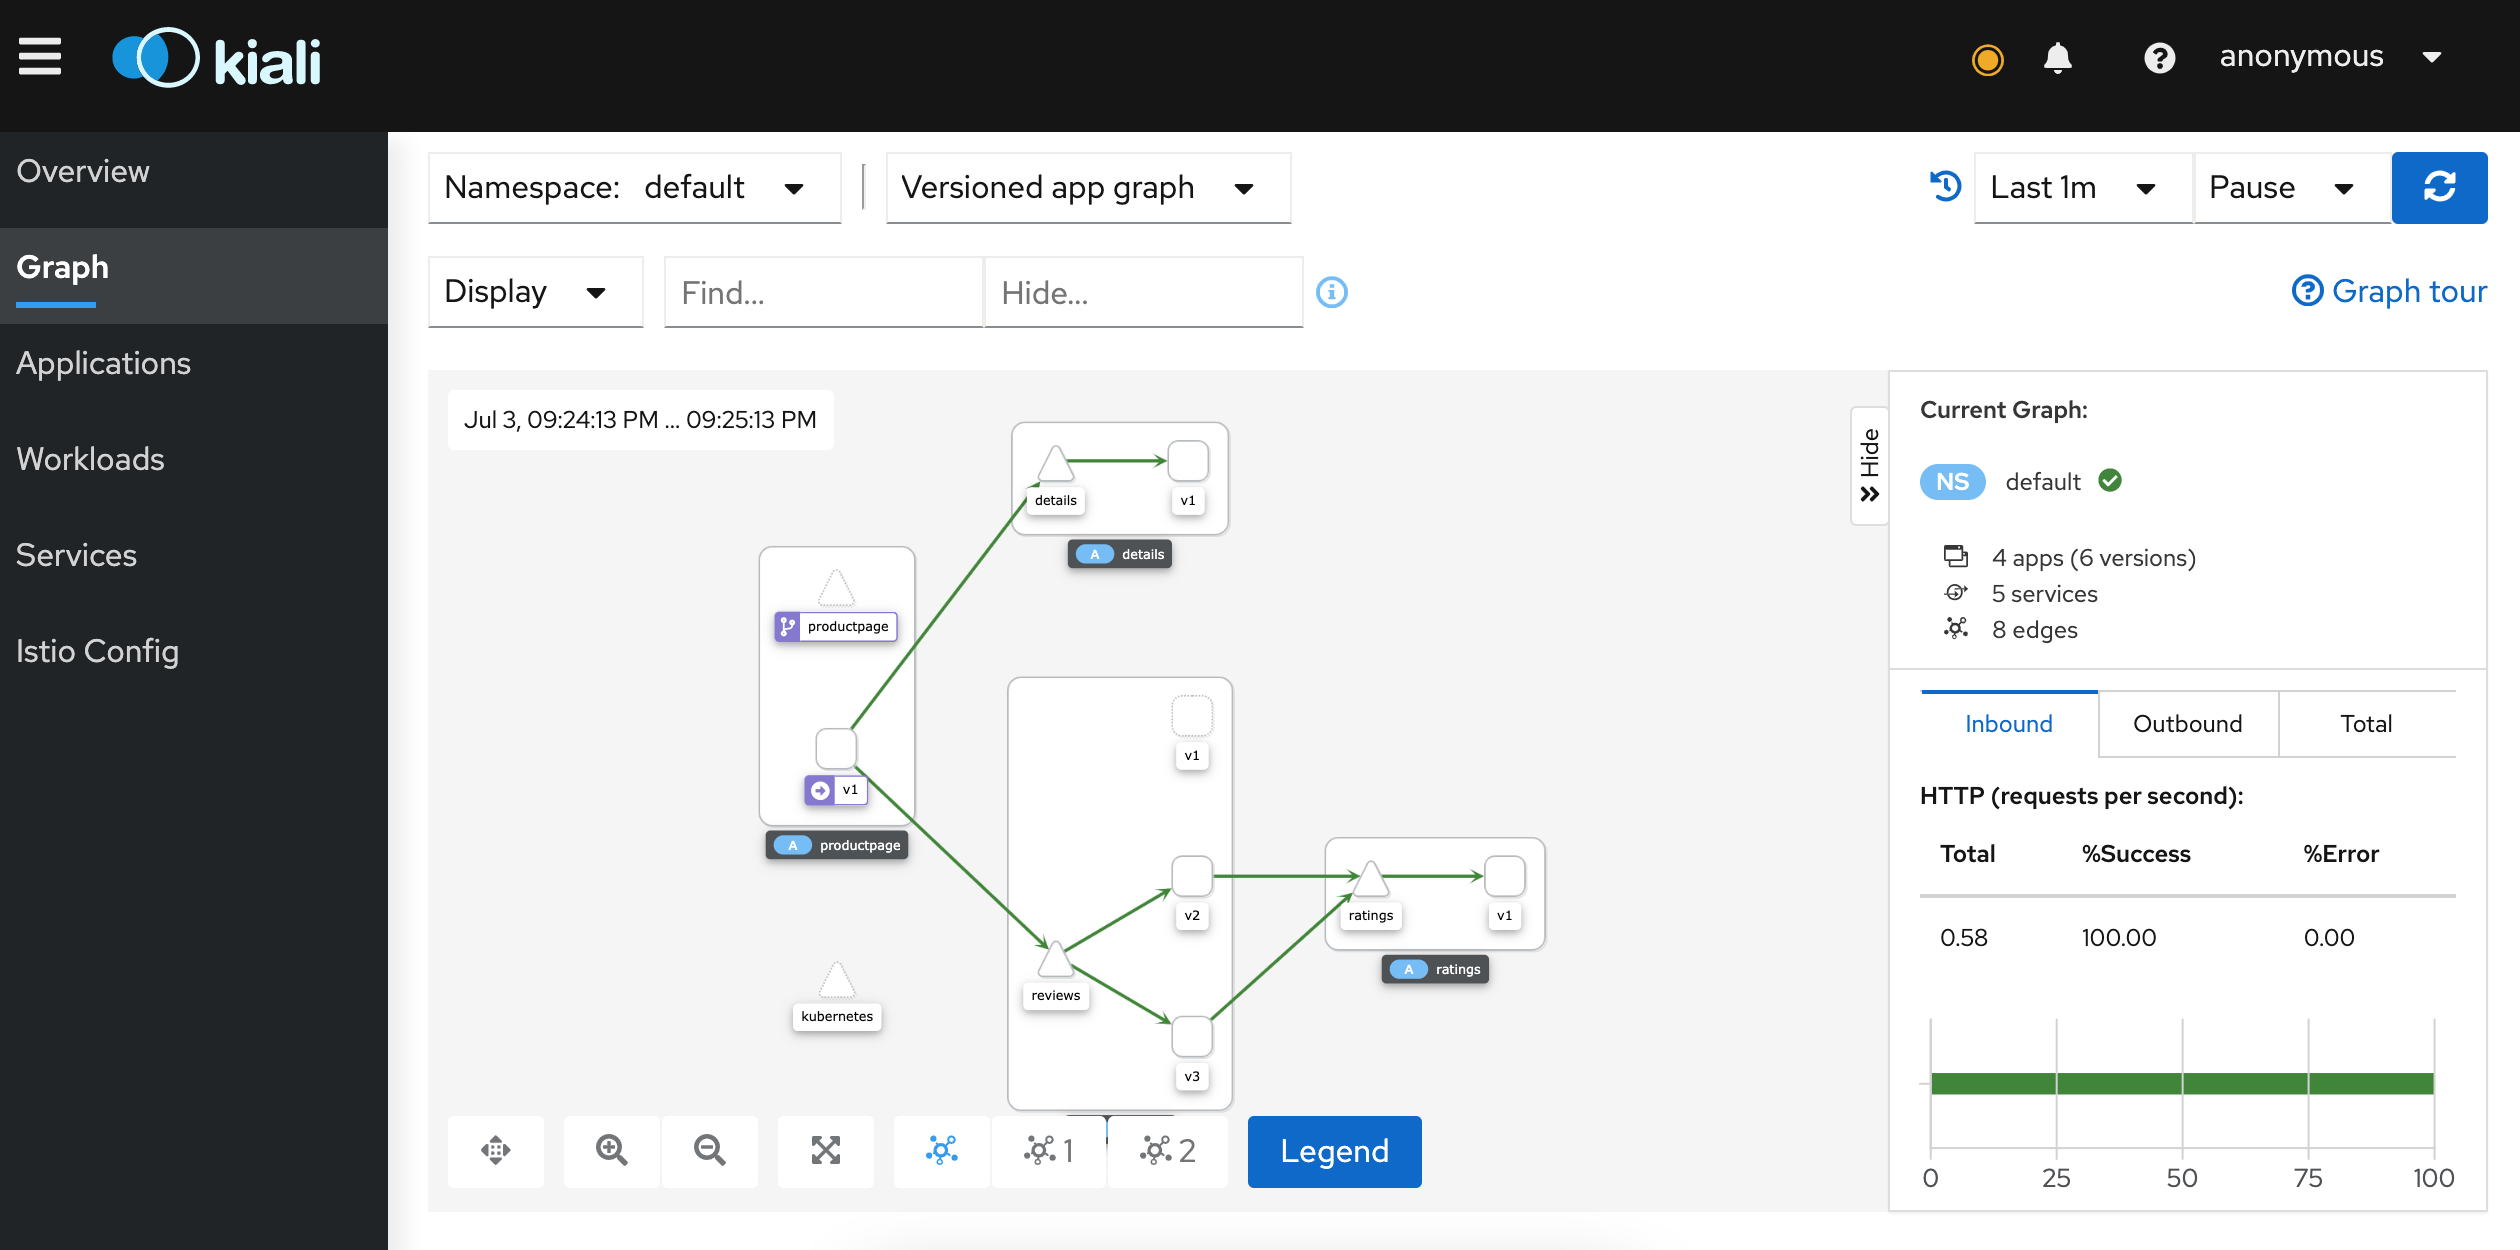
5.部署和查看Istio仪表板
istio和几个遥测应用做了集成。 遥测能帮你了解服务网格的结构、展示网络的拓扑结构、分析网格的健康状态。下面部署Kiali仪表板、 以及Prometheus、Grafana、Jaeger等插件。
kubectl apply -f samples/addons/
kubectl rollout status deployment/kiali -n istio-system
Waiting for deployment "kiali" rollout to finish: 0 of 1 updated replicas are available...
deployment "kiali" successfully rolled out等待kiali部署完成后,使用istioctl dashboard --address 0.0.0.0 kiali命令启动istio dashboard kiali的监听,打开地址即可访问kiali。在左侧的导航菜单,选择 Graph ,然后在 Namespace下拉列表中,选择default。Kiali仪表板展示了网格的概览、以及Bookinfo示例应用的各个服务之间的关系。它还提供过滤器来可视化流量的流动。