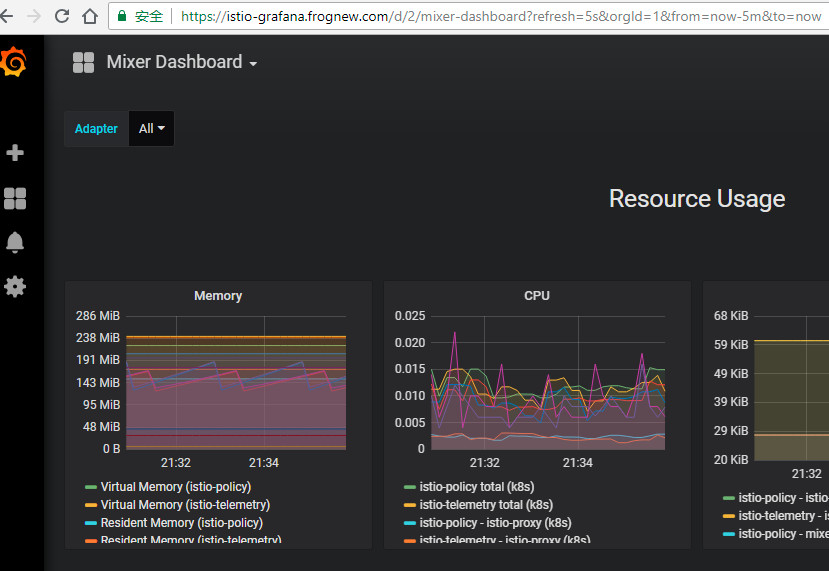
在Kubernetes中,可以使用Ingress资源将集群内部的Service暴露到集群外部,可参见之前整理的《Kubernetes Ingress实战》。 而Istio这个Service Mesh则推荐使用另一个更好的配置模型,即Istio Gateway。Istio Gateway可以允许我们将Istio的功能(如:监控和路由规则)应用到进入集群的流量。
本篇的实现环境如下:Kubernetes 1.12.0、Istio 1.0.3
kubectl get node -o wide
NAME    STATUS   ROLES         AGE     VERSION   INTERNAL-IP     EXTERNAL-IP   OS-IMAGE                KERNEL-VERSION          CONTAINER-RUNTIME
node1   Ready    edge,master   2d20h   v1.12.0   192.168.61.11   <none>        CentOS Linux 7 (Core)   3.10.0-693.el7.x86_64   docker://18.6.1
node2   Ready    edge          2d20h   v1.12.0   192.168.61.12   <none>        CentOS Linux 7 (Core)   3.10.0-693.el7.x86_64   docker://18.6.1
注意当Istio升级到1.0.3后,发现镜像仓库地址已经由gcr.io修改到docker hub上,省去了过去科学上网把镜像搞到的步骤
1.确认Istio Gateway的入口IP和端口
查看一下Istio Gateway的Service:
kubectl get svc istio-ingressgateway -n istio-system
NAME                   TYPE           CLUSTER-IP      EXTERNAL-IP   PORT(S)                                                                                                                   AGE
istio-ingressgateway LoadBalancer 10.105.171.39 <pending> 80:31380/TCP,443:31390/TCP,31400:31400/TCP,15011:31171/TCP,8060:31505/TCP,853:30056/TCP,15030:30693/TCP,15031:32334/TCP 20h当前EXTERNAL-IP处于pending状态,我们目前的环境并没有可用于Istio Ingress Gateway外部的负载均衡器,为了使得可以从外部访问,通过修改istio-ingressgateway这个Service的externalIps,以为当前Kubernetes集群的kube-proxy启用了ipvs,所以这个指定一个VIP 192.168.61.9作为externalIp。
kubectl edit svc istio-ingressgateway -n istio-system

......
spec:
  externalIPs:
  - 192.168.61.9

......
kubectl get svc istio-ingressgateway -n istio-system
NAME TYPE CLUSTER-IP EXTERNAL-IP PORT(S) AGE
istio-ingressgateway LoadBalancer 10.105.171.39 192.168.61.9 80:31380/TCP,443:31390/TCP,31400:31400/TCP,15011:31171/TCP,8060:31505/TCP,853:30056/TCP,15030:30693/TCP,15031:32334/TCP 20h此时EXTERNAL-IP已经设置为192.168.61.9这个VIP了,http相关的端口为80和443
2.使用Istio Gateway接入集群外部流量
在使用Istio Gateway之前,我们查看一下它的Pod,通过istio=ingressgateway这个Label可以找到它:
kubectl get pod -n istio-system -l istio=ingressgateway -o wide
NAME                                    READY   STATUS    RESTARTS   AGE   IP            NODE    NOMINATED NODE
istio-ingressgateway-7958d776b5-ddpbc 1/1 Running 0 20h 10.244.1.67 node2 <none>前面我们在《Istio 1.0学习笔记(一):在Kubernetes安装Istio》中将Istio中自带的grafana和jaeger暴露到集群外部时使用的Kubernetes的Ingress,本节我们尝试切换到Istio Gateway。
之前我们使用Ingress暴露grafana时创建的Ingress如下:
apiVersion: extensions/v1beta1
kind: Ingress
metadata:
  name: grafana
  namespace: istio-system
  annotations:
    nginx.ingress.kubernetes.io/ssl-redirect: "true"
    nginx.ingress.kubernetes.io/secure-backends: "false"
spec:
  rules:
  - host: istio-grafana.frognew.com
    http:
      paths:
      - path: /
        backend:
          serviceName: grafana
          servicePort: 3000
  tls:
  - hosts:
    - istio-grafana.frognew.com
    secretName: "frognew-com-tls-secret"
这次我们换成创建grafana的Gateway资源:
apiVersion: networking.istio.io/v1alpha3
kind: Gateway
metadata:
  name: grafana-gateway
  namespace: istio-system
spec:
  selector:
    istio: ingressgateway # use Istio default gateway implementation
  servers:
  - port:
      number: 80
      name: http
      protocol: HTTP
    hosts:
    - istio-grafana.frognew.com
在前面的学习过程中,使用Istio对服务进行流量管理时需要用到VirtualService,这里在使用Gateway时也要和VirtualService搭配使用,下面创建grafana的ViertualService:
apiVersion: networking.istio.io/v1alpha3
kind: VirtualService
metadata:
  name: grafana
  namespace: istio-system
spec:
  hosts:
  - istio-grafana.frognew.com
  gateways:
  - grafana-gateway
  http:
  - match:
    - uri:
        prefix: /
    route:
    - destination:
        port:
          number: 3000
        host: grafana
我们为grafana创建了一个VirtualService,并创建了到grafana Service的路由规则。
此时在浏览器中打开:http://istio-grafana.frognew.com即可。
下面为Gateway开启https,先将站点的SSL证书存放到istio-system命名空间中,要求名称必须是istio-ingressgateway-certs:
kubectl create secret tls istio-ingressgateway-certs --cert=fullchain.pem --key=privkey.pem -n istio-system修改Gateway:
apiVersion: networking.istio.io/v1alpha3
kind: Gateway
metadata:
  name: grafana-gateway
  namespace: istio-system
spec:
  selector:
    istio: ingressgateway
  servers:
  - port:
      number: 443
      name: https
      protocol: HTTPS
    tls:
      mode: SIMPLE
      serverCertificate: /etc/istio/ingressgateway-certs/tls.crt
      privateKey: /etc/istio/ingressgateway-certs/tls.key
    hosts:
- istio-grafana.frognew.com注意证书的位置必须是/etc/istio/ingressgateway-certs和创建Secret时的名称一致。此时,在浏览器中可以打开:https://istio-grafana.frognew.com/