环境
- JDK 1.8已经安装
- 将会安装Sonatype Nexus OSS 3.3
安装
下载安装包:
wget https://sonatype-download.global.ssl.fastly.net/nexus/3/nexus-3.3.1-01-unix.tar.gz创建运行用户:
group add nexus
useradd -g nexus -d /home/nexus nexus
解压缩安装包:
tar -zxvf nexus-3.3.1-01-unix.tar.gz -C /home/neuxs
ls /home/nexus
nexus-3.3.1-01  sonatype-work
修改数据目录中的配置文件:
cd /home/nexus/sonatype-work/nexus3/
vi nexus.properties

# 定制http端口号
application-port=8082
修改运行用户:
cd /home/nexus/nexus-3.3.1-01/bin
vi nexus.rc

run_as_user='nexus'

chown -R nexus:nexus /home/nexus
拷贝启动脚本:
cd /home/nexus/nexus-3.3.1-01/bin

cp nexus /etc/init.d
systemd unit文件/usr/lib/systemd/system/nexus.service:
[Unit]
Description=nexus service
After=network.target

[Service]
Type=forking
ExecStart=/home/nexus/nexus-3.3.1-01/bin/nexus start
ExecStop=/home/nexus/nexus-3.3.1-01/bin/nexus stop
User=nexus
Restart=on-abort

[Install]
WantedBy=multi-user.target
启动服务:
systemctl daemon-reload
systemctl enable nexus
systemctl start nexus
systemctl status nexus
浏览器打开http://server:8082,使用admin / admin123登录,修改admin的密码。
集成OpenLDAP
nexus集成LDAP比较简单,根据官方文档LDAP Integration在Web界面中一步步操作即可。
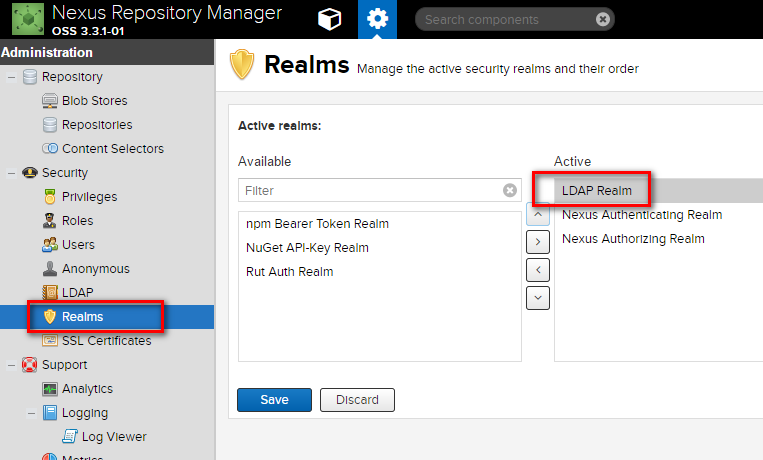
首先在设置–>Security–>Realms中添加LDAP Realm:
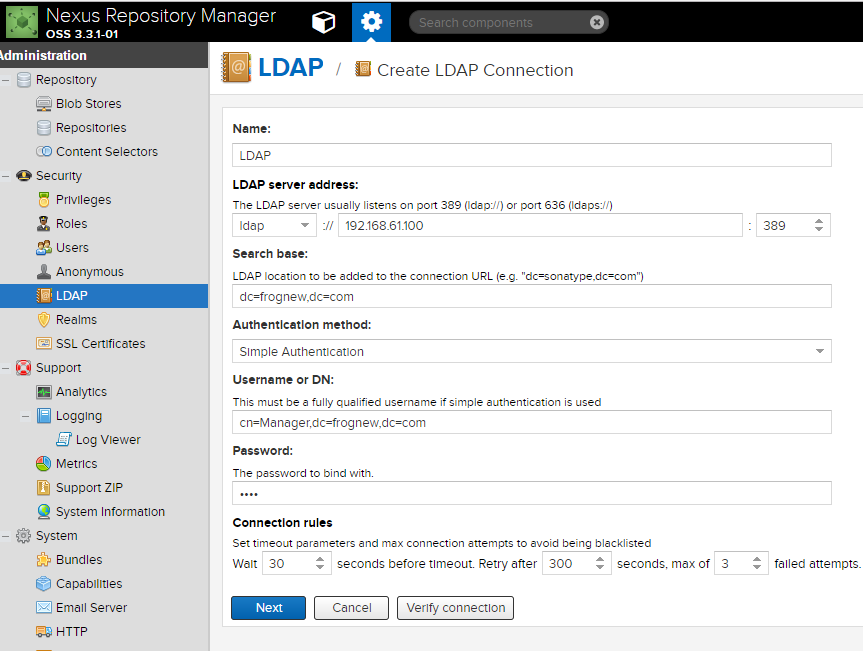
接下来在设置–>Security–>LDAP中创建Connecttion:
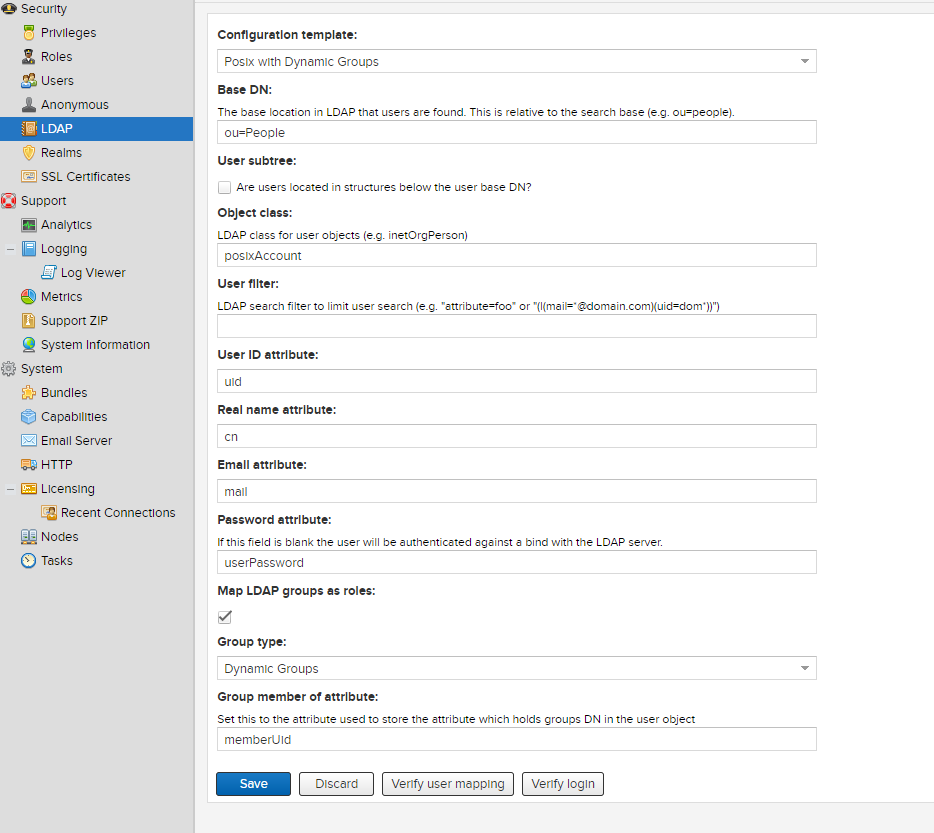
接下来设置用户和用户组信息: